Monte Carlo integration

I was reading a bit about random numbers and remembered that I wrote a simple Monte Carlo integrator in C++ a few years ago. I took a few minutes to cleanup and comment the code, which is presented below.

Monte Carlo integration is simple, but surprisingly powerful:

I=abf(x)dx
Ii=1nf(xi)p(xi)

xi is a random value within the range [a,b]

p(x) represents the distribution of random values, for a uniform distribution:

p(x)=1ba

This presentation by Fabio Pellacini provides a lot more details.

The test code in the main() method computes the integral of sin2(x) in the interval [3,5].

#include <iostream>
#include <cmath>
#include <ctime>
using namespace std;

// Functor base class for encapsulating 1-dimensional function to be integrated
class Function1d
{
    
public:
        
virtual double operator()(double x)
        {
            
return x;
        }
};

// Functor for sine squared function
class SineSquared : public Function1d
{
    
public:
        
double operator()(double x)
        {
            
return pow(sin(x), 2);
        }
};

// Monte Carlo integrator class declaration
class MonteCarloIntegrator
{
    
public:
        
double Run(int numSamples, Function1d& func, double intervalMin, double intervalMax);
};

// Monte Carlo integrator implementation
// ::Run() method implementation
double MonteCarloIntegrator::Run(int numSamples, Function1d& func, double intervalMin, double intervalMax)
{
    
double sum = 0;
    
double div = 1.0 / (double)RAND_MAX;
    
double intervalScale = 1.0 / (intervalMax-intervalMin);

    
for(int i=0; i<numSamples; i++)
    {
        
double rnd1 = intervalMin + ( ((double)rand() * div) * (intervalMax-intervalMin) );
        sum += (func)(rnd1) / intervalScale;
    }

    
return (1.0/(double)numSamples) * sum;
}

// main() function with test code
void main()
{
    MonteCarloIntegrator    integrator;    
    
double output = integrator.Run(5000000, SineSquared(), 3, 5);

    srand(time(NULL));
    std::cout << output << endl;

    getchar();
}


ISO 8601 and MySQL

I was curious what to name a variable holding a string with a date formatted for MySQL. Something like “startDateMysql” seemed silly, so I went digging as to what MySQL’s date format was based on.

The YYYY-MM-DD format used by MySQL is defined by ISO 8601.

The HH:MM:SS format is also defined by ISO 8601, but MySQL never adds the time zone designator, a ‘Z’ indicator for UTC or an offset from UTC. Without the time zone designator, the time is implied to be local time according to the standard, but MySQL returns non-local time without a designator, which is non-conformant.

When combining a date and time, MySQL omits the ‘T’ delimiter, which is allowed and permitted by “mutual agreement.”


Entering the world of high-DPI displays

With a Retina iPad and my recent purchase of a Yoga 2 laptop with a “Quad HD” display (3200×1800) I’ve been dragged into the world of high-DPI (more precisely PPI) displays. For years, DPI was “standard” at either 96dpi (Windows) or 72dpi (Mac OS), with a logical/software pixel being equivalent to a hardware pixel on the display device. A higher resolution monitor meant the content on your display got a bit smaller but you gained a couple more thousand pixels to work with, but the recent and massive increases in pixel densities seems to be the end of the 1:1 mapping between software and hardware pixel references. Below are a few notes on my experiences dealing with high-DPI displays and content so far.

  • Windows 8.1 support is terrible. Both application support and operating system support for high-DPI displays is abysmal. See the post Living a High-DPI desktop lifestyle can be painful by Scott Hanselman which reflects many of the issues I’ve encountered with my Yoga 2 as well. There’s a large list of issues: for non-DPI aware applications Windows scale text but not icons and layout, applications lie about being DPI-aware and are rendered too small, and some applications simply crash (TourtiseSVN’s diff… no clue why, too many pixels?!). It’s easy to wag a finger at application developers, but legacy support is clearly something the operating system needs to handle. In addition, despite Windows 8.1 touting automatic, per-monitor, DPI detection, it’s all based off of the DPI of a “primary monitor” and content on the other monitors is scaled to match. So dragging a window for an application from the Yoga 2 display across to a HD/96dpi monitor results in the window being scaled down (and visibly blurry). Worse, all applications undergo the same treatment – so if you’re thinking you can just use non-DPI aware applications on an external display until support comes around, guess again.
    ArsTechnica did a piece mentioning this issue in particular, and Windows 8.1’s high-DPI support is general.
  • Web support is only half-way there. The best thing done to support high-DPI displays was defining the CSS2 reference pixel to be independent of hardware pixels. Beyond that you have media queries and higher resolution background images, but there’s still no good way to specify alternate foreground images, though the <picture> element may gain support soon. In general, outside of CSS things gets messy, as is the case with a high-DPI <canvas>.
    One problem with the web that I don’t see a proposed solution for is handling low-resolution image assets for which you can’t get a higher resolution version. This is a problem I face with this blog. There’s a lot of images (old screenshots, low-resolution photos, etc.) for which I can’t get a 2x, 4x, etc., higher resolution version and there’s no way to prevent upscaling the images or specify how the upscaling is done. The typical 2x-bilinear-filtered upscaling, done by most browsers, is not always desirable. In addition, as display vendors pack more pixels in, what happens when the “high-resolution” version needed is 4x or 8x?
  • SVG/Vector-based images aren’t always the answer. There’s a lot of benefits to vector-based formats, but they’re not the holy grail many think they are. For vector-based images, rendering costs grow as you add details with polygons and paths. It’s why video games still rely heavily on texture mapping, even as graphics hardware has progressed to handle rendering millions of polygons per frame – the additional geometry and computation for fine details is enormous.


Triggering reflow to toggle a CSS3 transition

My previous post on triggering reflow focused on forcing reflow to allow for transitions when an element is put into the DOM render tree. This post doesn’t present any new concepts, but provides an example of triggering reflow, in the same manner, to allow for applying style changes to a DOM element instantly and without a transition, then turning the transition back on.

The changes to an element are typically:

  • Turn off the transition on the element
  • Update some properties of the element (that are part of the transition), and force reflow so that the changes are applied instantly without transition
  • Turn on the transition again

In working with transitions, this scenario has come up frequently for me, as much as dealing with DOM elements being put into the render tree.

One classic example where this becomes necessary is in constructing a circular carousel, as the trick to make it circular is to make the first slide a copy of the last slide – so the carousel starts on the second slide and when you reach the last slide, the carousel instantly jumps to the first slide and slides over to the second slide. This is all invisible to the user, and it appears that the carousel has transitioned smoothly from the last slide to the first slide.

The code for a working circular carousel with 3 slides (plus a copy of the last slide) is presented below, with the classes for the different states of the slides being slide1pre (copy of slide 3), slide1, slide2, and slide3.

Note the point where it is necessary to trigger reflow in order to invisibly jump to the first slide.

.carousel-viewport { width:70px; height:70px; overflow:hidden; }
.carousel-container { width:1000px; }

.carousel-container.notransition { transition:transform 0s; }
.carousel-container.dotransition { transition:transform 0.5s; }

.carousel-container.slide1pre { transform:translateX(0px); }
.carousel-container.slide1 { transform:translateX(-70px); }
.carousel-container.slide2 { transform:translateX(-140px); }
.carousel-container.slide3 { transform:translateX(-210px); }

.test-block { width:50px; height:50px; float:left; margin:10px; color:#fff; background:#222; }
<p><a class="ia-start-color-change" href="#">Rotate carousel</a></p>

<
div class="carousel-viewport">
<
div class="ia-carousel-container carousel-container dotransition slide1">
<
div class="ia-slide-pre test-block">3</div>
<
div class="ia-slide-1 test-block">1</div>
<
div class="ia-slide-2 test-block">2</div>
<
div class="ia-slide-3 test-block">3</div>
</
div>
</
div>
var curSlide = 1; // start at slide1

$('.ia-start-color-change').click(function (event) {

var testBlockElem = $('.ia-carousel-container');

// slide 1 to slide 2
if (curSlide == 1) {
testBlockElem.removeClass(
'slide1').addClass('slide2');
}

// slide 2 to slide 3
if (curSlide == 2) {
testBlockElem.removeClass(
'slide2').addClass('slide3');
}

// slide 3 to slide1pre, then slide1pre to slide1
if (curSlide == 3) {

// turn off transition
testBlockElem.removeClass('dotransition').addClass('notransition');
// go to slide1pre invisibly and instantly (w/o transition)
testBlockElem.removeClass('slide3').addClass('slide1pre');

//
// Force reflow to commit style changes to DOM
// allows us to re-apply transition rule, with the DOM updated to the carousel on slide1pre with no transition rule
//
testBlockElem[0].offsetWidth; // force reflow
//

// re-apply transition rule
testBlockElem.removeClass('notransition').addClass('dotransition');
// transition over to slide1
testBlockElem.removeClass('slide1pre').addClass('slide1');

// reset slide counter
// (note subsequent increment in this function, so we'll be at curSlide=1 when this function finishes)
curSlide = 0;
}

curSlide++;

event.preventDefault();
});


Triggering reflow for CSS3 transitions

There’s a lot written on minimizing reflow of the DOM, but one interesting situation is actually trying to force reflow in order to apply a CSS transition rule when the element is pushed into the DOM render tree (e.g. display:none to display:block, display:inline, etc.).

Problem

.test-block { width:50px; height:50px; background:#000; margin:10px; opacity:1; transition:opacity 0.5s; }
.test-block.invisible { opacity:0; }
.test-block.hide { display:none; }
<div class="ia-fadein-block test-block invisible hide"></div> $('.ia-fadein-block').removeClass('hide');
$(
'.ia-fadein-block').removeClass('invisible');

If we remove the hide and invisible classes from the div (as shown above), you’d assume that the div would transition smoothly to opacity:1 in 0.5s; however, this is not the case, the div will go to opacity:1 instantly.

What’s happening is that the removal of both classes occur prior to the browser adding the div to the DOM render tree; when the div gets rendered, it’s as if it never had the hide nor invisible class.

Reflow needs to be triggered before the invisible class is removed in order for the transition to work as expected.

Deprecated solution: setTimeout(func,0)

A setTimeout() with a delay of 0 was my go-to solution for the longest while. Here, the function argument specified would handle whatever needed to occur after the element was added to the DOM render tree (for the example presented above, this would mean the invisible class being removed in the function specified). The thinking behind using setTimeout() was that reflow would occur at some point in the current execution context and before the execution of the setTimeout() callback. This seemed true for a while, but with one of the Firefox releases last year (I don’t know specifically which) I noticed things breaking, with the Javascript engine executing the callback before reflow occured.

I did some quick hacks to fix existing code by increasing the time span before the timeout was triggered (typically 50ms-100ms), but this made a nasty hack even nastier and I wanted a more reliable solution.

Current solution: Trigger reflow manually

There are a number of calls that will trigger reflow on the DOM, but the most reliable calls, that always force reflow, seem to be the ones that return any sort of measurement that must be calculated (e.g. offsetWidth) on an element. With this in mind, the Javascript code can be modified as follows:

$('.ia-fadein-block').removeClass('hide');

// force reflow
$('.ia-fadein-block')[0].offsetWidth;
//

$('.ia-fadein-block').removeClass('invisible');

The code is for demonstration purposes; for repeated use, the hack to force reflow should really be encapsulated in a function, as there is no guarantee that the reflow behavior triggered by querying offsetWidth will remain consistent.

Ideal solution: API Method to trigger reflow or delay certain style changes post-reflow

The solution presented above is still a hack and may very well break in the future, as there is no guarantee that browsers won’t cache properties like offsetWidth in further attempts to minimize reflow. A robust, future-proof, solution is needed and it’s amazing one hasn’t come to fruition as yet.

A Mozilla bug report documents this issue and David Baron presents some workable solutions.


Snap to grid

Snapping a point to a grid is one of those seemingly complex tasks, which turns out to be actually quite simple when you approach it.

Given a arbitrary point (x,y) the coordinates it would snap to (sx, sy) on a 12×12 grid is found by:

var sx = Math.round(x / 12.0) * 12.0;
var sy = Math.round(y / 12.0) * 12.0;

Of course, 12 can be changed to anything to allow for a grid with different dimensions.


Trilite, application design experiment with XULRunner and .NET

Goodbye Adobe Air

Despite positive first impressions with Adobe Air, I began avoiding it a while ago for a few reason:

  • Air’s focus was very much geared towards Flash development, not HTML/CSS/JS, and I had no interest in Flash development
  • A lot of interesting web technologies never manifested within Air (SVG, WebGL) and it looked doubtful that Adobe cared to add anything that might challenge Flash
  • Linux support was dropped – a platform dropping OS support is not a good sign
  • Native interaction support, a feature in Air 2 which I was excited about, didn’t impress me in its implementation and it was very much geared towards Flash/ActionScript development
  • Adobe’s push for Air became more a platform for mobile development rather than desktop development, to the extent that desktop development was pushed far into the background

With all of the negatives above, coupled with the propriety, vendor lock-in, nature of Air, I really didn’t feel like using it for development of anything.

XULRunner / XPCOM

I was still optimistic and interested in web technologies (HTML/CSS/JS) for layout and styling in desktop applications. As I stated previous:

Looking into cross-platform GUI frameworks, I’ve played around with WinForms (cross platform with Mono), Qt, Gtk, and wxWidgets. I’ve been disappointed to various degrees with all of them. It hit me that the most flexible and powerful cross-platform layout and styling framework out there is the HTML/CSS combo. It’s not perfect (e.g. floats, vertical centering) but it’s pretty damn good.

I stated looking at other solutions. I didn’t want to relive my experiences dealing with compiling webkit (though I was, and still am, tempted to play around with chromiumembedded), so I went with XULRunner, which allows for bootstrapping XUL-based applications (e.g. Firefox). XUL is not HTML, and in actuality provides markup to design a UI with native controls, but one control provided is the iframe control which renders and interprets HTML, CSS, and Javascript.

Having XUL for the application interface, you could write a desktop application with the application logic in Javascript, but you’re bound by the same limitations as a web application. XPCOM is a solution to these limitations and allows for interactions with the host system for things such as reading files, running another process, etc. That said, I wasn’t excited to learn XPCOM – it seemed convoluted and I didn’t want to waste time doing a deep-dive into yet another framework and being tied down to its limitations. I figured if I could write the application logic in another executable and have it communicate with the UI via a lightweight (very lightweight) XPCOM-based component, that would be ideal. In terms of simplicity and availability, sockets seemed like the go-to solution for Inter-process communication between XPCOM and anything else.

The Socket Bridge

So I came around to the idea of a Socket Bridge (I had originally played around with it in an Adobe Air project and was able to apply it here as well). Within the XUL application, Javascript-based XPCOM code would implement the Socket Bridge client and the executable handling the application logic would implement the Socket Bridge server, and the 2 could communicate easily.

SocketBridge

An HTTP server could take the place of the SocketBridge server, but I felt that was overkill, less flexible, and added an additional layer of complexity as the server then needed to be connected to the application code.

Trilite

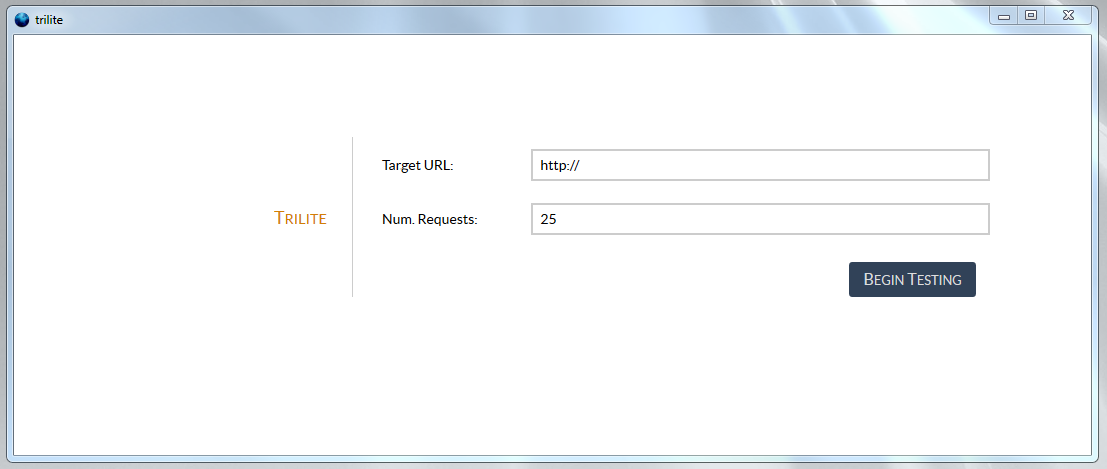
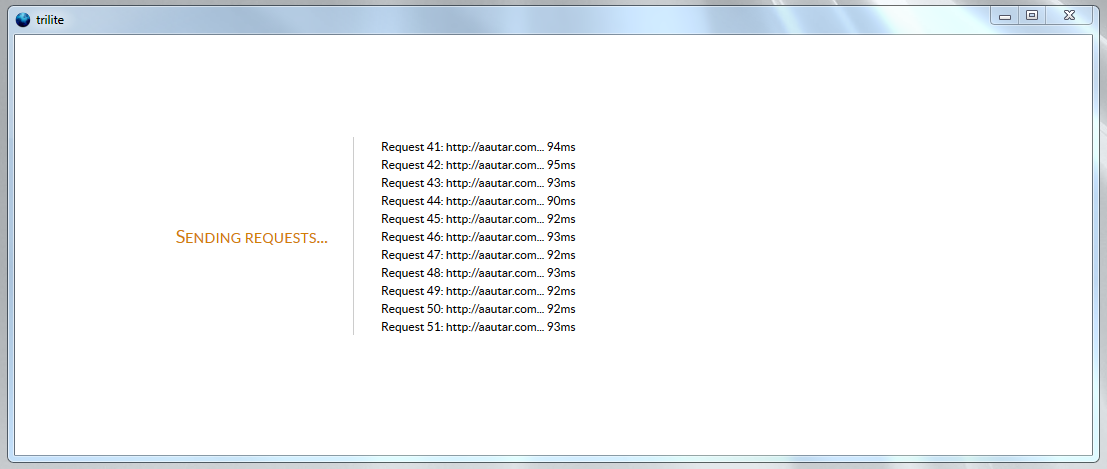
As a proof-of-concept, I began working on Trilite, a simple HTTP profiling tool, with the application logic done in C#, that would send a number of HTTP requests to a server, capture the time it took to get a response, and calculate some simple stats about the results. A pretty simple application but something pretty handy for optimization work.

I’m pretty happy with the results thus far, particularly with regards to having a consistent, stable, and cross-platform UI.

You can find the current code in the Trilite repository.

There is no bootstrap to launch the Socket Bridge server and XULRunner app, they need to be executed manually for the application to launch:

  • Launch the server by running /trilite.public/app-server/trilite/trilite/bin/Debug/trilite.exe
  • Launch XULRunner, in /trilite.public/xulrunner, with the application.ini file in the root directory. For Windows, you can also run the trilite shortcut in the root directory.

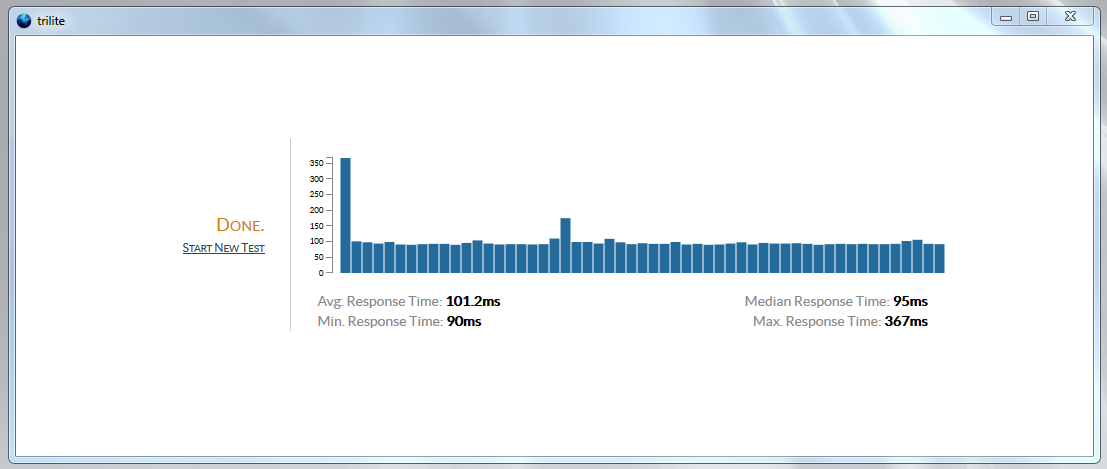
A few screenshots under Windows:

Trilite

Trilite

Trilite

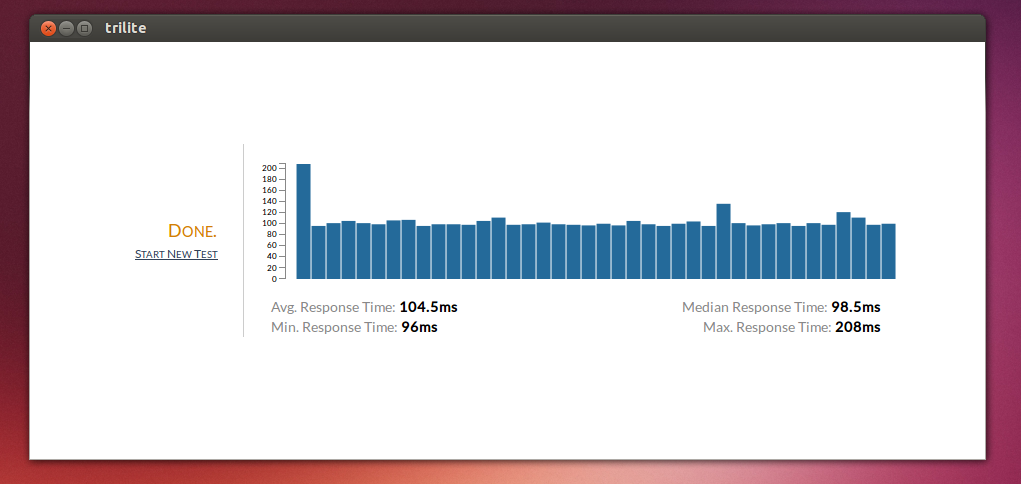
And here’s Trilite running under Ubuntu:

Trilite on Ubuntu

This post should, hopefully, provide a top-level overview of the application architecture. I’ll be writing more about XUL, XPCOM, the Socket Bridge, and Trilite in subsequent posts, providing more details and code.


Fixed (non-resizable) windows with XULRunner

I’ve been working a bit with XULRunner lately and wanted to create a fixed, non-resizable application window. After some searching, I eventually stumbled upon some code which led to a solution – adding a function call to the application’s prefs.js file:

pref("toolkit.defaultChromeFeatures", "chrome,resizable=no,dialog=no");

resizable=no prevents the window from being resized, dialog=no makes it a non-dialog window so that you can still minimize it.

Simple stuff, but this was difficult to find. Discovered thanks to this post on glazman.org

Note that after some testing with XULRunner on Ubuntu, it appears that this may be a Windows-only setting.


Interaction classes – seperating CSS styles from Javascript interactions

Something I’ve been doing for a while in my web development work is applying separate classes, interaction classes, to DOM elements that interact with Javascript. Basically, an interaction class is applied to any DOM element touched by Javascript code – an element bound to an event handler, an input element with it’s value being read or written, an element selected for animation, etc. The goal being to de-couple styling from interaction, allowing style changes to not interfere with JS code, and vice-versa.

Below is a bit of code to demonstrate what I’m talking about. As a convention, I apply a “ia-” prefix to my interaction classes.

<a href="#" class="btn-primary ia-begin-testing">Begin Testing</a>
  • btn-primary has the CSS rules for styling the anchor as a button
  • ia-begin-testing is bound to a JS event that triggers some arbitrary “begin testing” action

If the future, if I want to change the button to a link (remove the btn-primary class), change it to a secondary button (btn-primary to btn-secondary), or change styling in any other way, the Javscript code is unaffected and requires no changes.

In addition, the ia-begin-testing class can also be applied to other elements (another button, a link, an anchor wrapping an image, etc.) and is automatically bound to the same interaction functions, without writing additional JS DOM selection code. The ia-begin-testing class can also be removed, or changed to another interaction class, and the styling on the button remains the same.

While IDs and data attributes are also good choices for architecting this sort of style/interaction separation, I like classes for 2 reasons:

  • Selection via class is relatively fast across all browsers compared to selection via data attributes
  • Compared to IDs, classes can be re-used allowing the same interactions to be shared by multiple elements (e.g. a button and a link can both trigger the same function)

One of the reasons I wrote this post is as an alternative to the the “grouping of selectors” approach presented in Chris Coyier’s Can You “Over Organize” JavaScript? article. With interaction classes, there’s little need for grouping selectors. Aside from the benefit of de-coupling styling and interaction, you get the advantage of a single class (ia-whatever), on whatever and however many elements, mapping all said elements to their necessary JS functions. With grouping of selectors, some sanity is brought to the scattered DOM selection code, but you’re left with the burden of maintaining a pool of different element IDs, classes, etc.; a chore that only gets harder as the codebase grows and changes.


glfx – WebGL basis

The base code for my WebGL experiments have been pretty sloppy thus far. I recently took some time to cleanup the code in order to have a more solid basis to work from and I’m presenting it here as a primer for anyone looking for a simple bootstrap or a code-heavy intro to WebGL.

A walk-through of the base code (glfx) and sample code to generate the demo shown below follows. The code is also available via the glfx bitbucket repository.

Dependencies

For matrix and vector operations, the glMatrix library.

Also window.requestAnimationFrame needs to be defined. For older browsers the following shim can be used:

window.requestAnimationFrame = (function(time){
return window.requestAnimationFrame ||
         window.webkitRequestAnimationFrame ||
         window.mozRequestAnimationFrame ||
         window.oRequestAnimationFrame ||
         window.msRequestAnimationFrame ||
        
function( callback ){
            window.setTimeout(callback, 1000 / 60);
         };
})();    

glfx

glfx is the crux of the rendering interface and encapsulates the WebGL context, functionality to load assets (shaders, textures, models), and functionality to setup and render the scene.

// glfx object wraps everything necessary for the rendering interface
var glfx = { };

// echo function to output debug statements to console
glfx.echo = function(txt) {
if(typeof console.log !== 'undefined') {
console.log(txt);
}
}

// WebGL context
glfx.gl = null;

// reference count for assets needed before rendering()
glfx.assetRef = 0;
// function to call when all assets are loaded, set by user via glfx.whenAssetsLoaded, reset internally
glfx.onAssetsLoaded = function() { };
// function to schedule callback when all assets are loaded, set by user
glfx.whenAssetsLoaded = function(_callback) {
if(typeof _callback !== 'undefined') {
if(glfx.assetRef === 0) {
_callback();
}
else {
glfx.onAssetsLoaded = _callback;
}
}
}
// function to increment asset ref count
glfx.incAssetRef = function() {
glfx.assetRef++;
if(glfx.assetRef === 0) {
glfx.onAssetsLoaded();
glfx.onAssetsLoaded =
function() { }; // reset
}
}
// function to decrement asset ref count
glfx.decAssetRef = function() {
glfx.assetRef--;
}

// Shaders class
glfx.shaders = { };
// buffer to store loaded shaders
glfx.shaders.buffer = new Array();

// Function to load vertex shader from external file
// _url = path to shader source
// _type = gl.VERTEX_SHADER / gl.FRAGMENT_SHADER
// _callback = function to call after shader is created, shader object passed is shader is successfully compiled, null otherwise
glfx.shaders.load = function(_url, _name, _type, _callback) {
glfx.decAssetRef();

var xmlhttp = new XMLHttpRequest();
xmlhttp.onreadystatechange =
function() {                
if (xmlhttp.readyState == 4 && xmlhttp.status == 200) {

var shaderSrc = xmlhttp.responseText;
var shader = glfx.gl.createShader(_type);

glfx.gl.shaderSource(shader, shaderSrc);
glfx.gl.compileShader(shader);

if (!glfx.gl.getShaderParameter(shader, glfx.gl.COMPILE_STATUS)) {
shader =
null;
}

if(typeof _callback !== 'undefined') {
_callback(shader);
}

glfx.shaders.buffer[_name] = shader;

glfx.incAssetRef();
}
}

xmlhttp.open(
"GET", _url, true);
xmlhttp.send();
}


// Textures class
glfx.textures = { };
// Textures array
glfx.textures.buffer = new Array();
// Method to load texture from file
glfx.textures.load = function(_path, _name) {

glfx.decAssetRef();

glfx.textures.buffer[_name] = glfx.gl.createTexture();

var tex=glfx.textures.buffer[_name];
tex.image =
new Image();
tex.image.onload =
function() {                

var tex = glfx.textures.buffer[_name];                                                            
glfx.gl.bindTexture(glfx.gl.TEXTURE_2D, tex);
glfx.gl.pixelStorei(glfx.gl.UNPACK_FLIP_Y_WEBGL,
true);
glfx.gl.texImage2D(glfx.gl.TEXTURE_2D, 0, glfx.gl.RGBA, glfx.gl.RGBA, glfx.gl.UNSIGNED_BYTE, tex.image);

glfx.gl.texParameteri(glfx.gl.TEXTURE_2D, glfx.gl.TEXTURE_MAG_FILTER, glfx.gl.LINEAR);
glfx.gl.texParameteri(glfx.gl.TEXTURE_2D, glfx.gl.TEXTURE_MIN_FILTER, glfx.gl.LINEAR);

// required for non-power-of-2 textures
glfx.gl.texParameteri(glfx.gl.TEXTURE_2D, glfx.gl.TEXTURE_WRAP_S, glfx.gl.CLAMP_TO_EDGE);
glfx.gl.texParameteri(glfx.gl.TEXTURE_2D, glfx.gl.TEXTURE_WRAP_T, glfx.gl.CLAMP_TO_EDGE);

glfx.gl.bindTexture(glfx.gl.TEXTURE_2D,
null);

glfx.incAssetRef();

}

tex.image.src = _path;            
}


// Model class
glfx.model = function() {

this.vertexBuffer = null;
this.indexBuffer = null;
this.texcoordBuffer = null;
this.normalBuffer = null;

}

// Models class
glfx.models = { };
// Models array
glfx.models.buffer = new Array();
// Method to load models from JSON file
glfx.models.load = function(_url, _name, _callback) {

glfx.decAssetRef();

var xmlhttp = new XMLHttpRequest();
xmlhttp.onreadystatechange =
function() {                
if (xmlhttp.readyState == 4 && xmlhttp.status == 200) {

var data = JSON.parse(xmlhttp.responseText);

var mdl = new glfx.model();

mdl.vertexBuffer = glfx.gl.createBuffer();
glfx.gl.bindBuffer(glfx.gl.ARRAY_BUFFER, mdl.vertexBuffer);
glfx.gl.bufferData(glfx.gl.ARRAY_BUFFER,
new Float32Array(data.verts), glfx.gl.STATIC_DRAW);
mdl.vertexBuffer.itemSize = 3;
mdl.vertexBuffer.numItems = data.verts.length / 3;

mdl.indexBuffer = glfx.gl.createBuffer();
glfx.gl.bindBuffer(glfx.gl.ELEMENT_ARRAY_BUFFER, mdl.indexBuffer);
glfx.gl.bufferData(glfx.gl.ELEMENT_ARRAY_BUFFER,
new Uint16Array(data.indices), glfx.gl.STATIC_DRAW);
mdl.indexBuffer.itemSize = 1;
mdl.indexBuffer.numItems = data.indices.length;        

if(data.texcoords.length > 0) {
mdl.texcoordBuffer = glfx.gl.createBuffer();
glfx.gl.bindBuffer(glfx.gl.ARRAY_BUFFER, mdl.texcoordBuffer);
glfx.gl.bufferData(glfx.gl.ARRAY_BUFFER,
new Float32Array(data.texcoords), glfx.gl.STATIC_DRAW);
mdl.texcoordBuffer.itemSize = 2;
mdl.texcoordBuffer.numItems = data.texcoords.length / 2;            
}

if(data.normals.length > 0) {
mdl.normalBuffer = glfx.gl.createBuffer();
glfx.gl.bindBuffer(glfx.gl.ARRAY_BUFFER, mdl.normalBuffer);
glfx.gl.bufferData(glfx.gl.ARRAY_BUFFER,
new Float32Array(data.normals), glfx.gl.STATIC_DRAW);
mdl.normalBuffer.itemSize = 3;
mdl.normalBuffer.numItems = data.normals / 3;
}

glfx.models.buffer[_name] = mdl;

glfx.incAssetRef();
}
}

xmlhttp.open(
"GET", _url, true);
xmlhttp.send();
}


// Scene class
glfx.scene = { };
// Scene last render time
glfx.scene.ptime = 0;
// Model-View matrix
glfx.scene.matModelView = null;
// Perspective matrix
glfx.scene.matPerspective = null;
// Scene graph
glfx.scene.graph = new Array();

// Class for scene (world) objects
// _base = object with vertex buffer, index buffer, texture coordinate buffer, etc.
glfx.scene.worldObject = function(_base, _shaderProgram) {
this.base = _base;            
this.shprog = _shaderProgram;
this.position = vec3.create();
this.rotation = vec3.create();
this.scale = vec3.create([1.0, 1.0, 1.0]);
this.update = function() { };
}

// method to add object to scene graph
glfx.scene.addWorldObject = function(_wo) {
glfx.scene.graph.push(_wo);
}

// set field of view
glfx.setFOV = function(_fov) {
mat4.perspective(_fov, glfx.gl.viewportWidth / glfx.gl.viewportHeight, 0.1, 100.0, glfx.scene.matPerspective);
}

// set clear color
glfx.setClearColor = function(_color) {
glfx.gl.clearColor(_color[0], _color[1], _color[2], _color[3]);
}

// Initialization function
// _canvas = DOM canvas element
// _onInitComplete (optional) = callback after init is complete
glfx.init = function(_canvas, _onInitComplete) {

glfx.gl = _canvas.getContext(
"experimental-webgl", {antialias:true});
if (!glfx.gl) {
glfx.echo(
"No webGL support.");
return false;
}

// Set viewport width,height based on dimensions of canvas element
glfx.gl.viewportWidth = _canvas.width;
glfx.gl.viewportHeight = _canvas.height;            

// Set clear color
glfx.setClearColor([1,1,1,1]);

// Enable depth buffer
glfx.gl.enable(glfx.gl.DEPTH_TEST);                

// Setup scene matrices
glfx.scene.matPerspective = mat4.create();
glfx.scene.matModelView = mat4.create();            
glfx.setFOV(90);

// Reset render target
glfx.gl.bindTexture(glfx.gl.TEXTURE_2D, null);
glfx.gl.bindRenderbuffer(glfx.gl.RENDERBUFFER,
null);
glfx.gl.bindFramebuffer(glfx.gl.FRAMEBUFFER,
null);

// Execute callback if one was passed
if(typeof _onInitComplete !== 'undefined') {
_onInitComplete();
}

// Begin rendering
glfx.render(0);

return true;
}

// Render loop function
glfx.render = function(time) {

requestAnimationFrame(glfx.render);

if(glfx.assetRef < 0) {
return;
}

// Reset framebuffer
glfx.gl.bindFramebuffer(glfx.gl.FRAMEBUFFER, null);        

// Clear viewport
glfx.gl.viewport(0, 0, glfx.gl.viewportWidth, glfx.gl.viewportHeight);
glfx.gl.clear(glfx.gl.COLOR_BUFFER_BIT | glfx.gl.DEPTH_BUFFER_BIT);                    

// Calculate frame time delta
var tdelta = 0;
if(glfx.scene.ptime > 0) {
tdelta = time - glfx.scene.ptime;
}    
glfx.scene.ptime = time;

// Render all models in scene
for(var i=0; i<glfx.scene.graph.length; i++) {

mat4.identity(glfx.scene.matModelView);                

glfx.scene.graph[i].update(tdelta, glfx.scene.graph[i]);
var objpos = glfx.scene.graph[i].position;
var objrot = glfx.scene.graph[i].rotation;
var objscale = glfx.scene.graph[i].scale;

mat4.scale(glfx.scene.matModelView, objscale);
mat4.translate(glfx.scene.matModelView, objpos);
mat4.rotate(glfx.scene.matModelView, objrot[0], [1, 0, 0]);                
mat4.rotate(glfx.scene.matModelView, objrot[1], [0, 1, 0]);        
mat4.rotate(glfx.scene.matModelView, objrot[2], [0, 0, 1]);                        

glfx.scene.graph[i].render(tdelta, glfx.scene.graph[i], glfx.scene.matModelView, glfx.scene.matPerspective);
}

}

Initializing glfx

Initializing glfx simply involves calling the glfx.init() function with the canvas element that’s going to be used to render on.

var canvasElem = document.getElementById('wgl-canvas');
glfx.init(canvasElem);

This will setup the rendering interface which will begin rendering frames, but as there is nothing in the scene only a clear is done when a frame is rendered. The clear color is set to white (1,1,1,1) and the field of view set to 90deg by default; these can be changed with the glfx.setClearColor() and glfx.setFOV() methods, respectively.

Loading assets

Assets (shaders, textures, and models) are loaded asynchronously via AJAX requests. As there may be dependencies on multiple assets for rendering and scene creation, a simple semaphore is used, glfx.assetRef.

  • glfx.assetRef is decremented when a new request for an asset is issued and incremented once the AJAX call succeeds and the asset has been created.
  • When glfx.assetRef < 0, it indicates a pending asset for the scene and no rendering is done.
  • A callback can be scheduled for when glfx.assetRef = 0 (i.e. all pending assets loaded) via the glfx.whenAssetsLoaded() method.
// Load basic shaders for rendering
glfx.shaders.load('basic.vs', "vert-shader-basic", glfx.gl.VERTEX_SHADER);
glfx.shaders.load(
'basictex.fs', "frag-shader-tex", glfx.gl.FRAGMENT_SHADER);

// Load necessary textures
glfx.textures.load('img/test.png', 'test-tex');                    

// Load models used in scene
glfx.models.load('cube.json', 'cubemdl', glfx.models.jsonParser);

Note that all the asset load methods take a URL as the first argument, and a name as the second argument. The name is an identifier by which to lookup the asset from the buffer it’s stored in. Also, glfx.models.jsonParser is the only model parser available and loads models corresponding to the JSON data produced by my Wavefront OBJ to JSON converter.

Building a scene

After assets are loaded, we can can create shader programs and world objects, then add them to the scene.

glfx.whenAssetsLoaded(function() {

// Create shader program from loaded shaders
var shprog = glfx.gl.createProgram();
glfx.gl.attachShader(shprog, glfx.shaders.buffer[
'vert-shader-basic']);
glfx.gl.attachShader(shprog, glfx.shaders.buffer[
'frag-shader-tex']);
glfx.gl.linkProgram(shprog);

if (!glfx.gl.getProgramParameter(shprog, glfx.gl.LINK_STATUS)) {
alert(
"Could not create shader program");
return false;
}

// Setup variables for shader program
shprog.vertexPositionAttribute = glfx.gl.getAttribLocation(shprog, "aVertexPosition");
glfx.gl.enableVertexAttribArray(shprog.vertexPositionAttribute);            

shprog.pMatrixUniform = glfx.gl.getUniformLocation(shprog,
"uPMatrix");
shprog.mvMatrixUniform = glfx.gl.getUniformLocation(shprog,
"uMVMatrix");

shprog.textureCoordAttribute = glfx.gl.getAttribLocation(shprog,
"aTextureCoord");
glfx.gl.enableVertexAttribArray(shprog.textureCoordAttribute);                        


// add some cubes to the scene graph
var cubeA = new glfx.scene.worldObject(glfx.models.buffer['cubemdl'], shprog);
cubeA.position = vec3.create([-1.6, 0.0, -25.0]);
cubeA.rotation = vec3.create([0.0, 0.0, 0.0]);
cubeA.scale = vec3.create([0.70, 1.0, 1.0]);
cubeA.render =
function(tdelta, wobj, matModelView, matPerspective) {
// Setup shader program to use
var shprog = wobj.shprog;
glfx.gl.useProgram(shprog);    

var tex = glfx.textures.buffer['test-tex'];                
glfx.gl.activeTexture(glfx.gl.TEXTURE0);
glfx.gl.bindTexture(glfx.gl.TEXTURE_2D, tex);
glfx.gl.uniform1i(shprog.samplerUniform, 0);


glfx.gl.bindBuffer(glfx.gl.ARRAY_BUFFER, wobj.base.vertexBuffer);
glfx.gl.vertexAttribPointer(shprog.vertexPositionAttribute, wobj.base.vertexBuffer.itemSize, glfx.gl.FLOAT,
false, 0, 0);                

glfx.gl.bindBuffer(glfx.gl.ARRAY_BUFFER, wobj.base.texcoordBuffer);
glfx.gl.vertexAttribPointer(shprog.textureCoordAttribute, wobj.base.texcoordBuffer.itemSize, glfx.gl.FLOAT,
false, 0, 0);                    

glfx.gl.uniformMatrix4fv(shprog.pMatrixUniform,
false, matPerspective);
glfx.gl.uniformMatrix4fv(shprog.mvMatrixUniform,
false, matModelView);                

glfx.gl.bindBuffer(glfx.gl.ELEMENT_ARRAY_BUFFER, wobj.base.indexBuffer);
glfx.gl.drawElements(glfx.gl.TRIANGLES, wobj.base.indexBuffer.numItems, glfx.gl.UNSIGNED_SHORT, 0);    
}

cubeA.update =
function(tdelta, wobj) {

// some code to position and spin cubeA

if(wobj.position[2] < -5.0) {
wobj.position[2] += 0.022 * tdelta;
}
else {
wobj.position[2] = -5.0;
}

wobj.rotation[0] = 0.35;
wobj.rotation[1] += -(75 * tdelta) / 50000.0;
if( Math.abs(wobj.rotation[1]) >= 2.0*Math.PI ) {
wobj.rotation[1] = 0.0;
}
}
glfx.scene.addWorldObject( cubeA );


// Add another cube to the scene
var cubeB = new glfx.scene.worldObject(glfx.models.buffer['cubemdl'], shprog);
cubeB.position = vec3.create([1.6, 0.0, -25.0]);
cubeB.rotation = vec3.create([0.0, 0.0, 0.0]);
cubeB.scale = vec3.create([0.70, 1.0, 1.0]);
cubeB.update =
function(tdelta, wobj) {
// some code to position and spin cubeB
if(cubeA.position[2] > -15.0) {
if(wobj.position[2] < -5.0) {
wobj.position[2] += 0.022 * tdelta;
}
else {
wobj.position[2] = -5.0;
}
}

wobj.rotation[0] = 0.35;
wobj.rotation[1] += -(75 * tdelta) / 50000.0;
if( Math.abs(wobj.rotation[1]) >= 2.0*Math.PI ) {
wobj.rotation[1] = 0.0;
}
}

cubeB.render =
function(tdelta, wobj, matModelView, matPerspective) {
// Setup shader program to use
var shprog = wobj.shprog;
glfx.gl.useProgram(shprog);    

var tex = glfx.textures.buffer['test-tex'];                
glfx.gl.activeTexture(glfx.gl.TEXTURE0);
glfx.gl.bindTexture(glfx.gl.TEXTURE_2D, tex);
glfx.gl.uniform1i(shprog.samplerUniform, 0);


glfx.gl.bindBuffer(glfx.gl.ARRAY_BUFFER, wobj.base.vertexBuffer);
glfx.gl.vertexAttribPointer(shprog.vertexPositionAttribute, wobj.base.vertexBuffer.itemSize, glfx.gl.FLOAT,
false, 0, 0);                

glfx.gl.bindBuffer(glfx.gl.ARRAY_BUFFER, wobj.base.texcoordBuffer);
glfx.gl.vertexAttribPointer(shprog.textureCoordAttribute, wobj.base.texcoordBuffer.itemSize, glfx.gl.FLOAT,
false, 0, 0);                    

glfx.gl.uniformMatrix4fv(shprog.pMatrixUniform,
false, matPerspective);
glfx.gl.uniformMatrix4fv(shprog.mvMatrixUniform,
false, matModelView);                

glfx.gl.bindBuffer(glfx.gl.ELEMENT_ARRAY_BUFFER, wobj.base.indexBuffer);
glfx.gl.drawElements(glfx.gl.TRIANGLES, wobj.base.indexBuffer.numItems, glfx.gl.UNSIGNED_SHORT, 0);    
}

glfx.scene.addWorldObject( cubeB );

});

Shaders for programs are pulled from the glfx.shaders.buffer[] associative array, referenced by the name specified when they were loaded.

Once we have a shader program and a model, we can create items for the scene by constructing glfx.scene.worldObject objects:

  • Construct the glfx.scene.worldObject object by specifying a model from the glfx.models.buffer[] associative array and the shader program as arguments to the constructor.
  • The worldObject.position, worldObject.rotation, and worldObject.scale vectors can be set as desired.
  • The worldObject.update() method can be overridden to describe how to manipulate the object in each frame.
  • The worldObject.render() method can be overridden to render the objects making use of the underlying buffers in worldObject.base: worldObject.base.indexBuffer, worldObject.base.vertexBuffer, worldObject.base.normalBuffer, worldObject.base.texcoordBuffer, as well as textures from the glfx.textures.buffer[] associative array.
  • Note that transformation on the model-view matrix (matModelView) is done within glfx.render() and should not be done within worldObject.render().

This callback is not ideal. I’m exposing a lot of rendering code that would best be abstracted away to glfx. However, without a strict definition of how a model should be textured or what variables are to be passed over to the vertex and fragment shaders, abstracting further is premature.